Category Archives: Recipes

Happy Christmas

Christmas is a time for gratitude, remembering all those things you are thankful for, and indulging in things that make you happy, spending time with loved ones and overdosing on favourite foods. I have a lot to be grateful for, and one thing that is high on my happiness list is chocolate. I decided to revisit a recipe from last year and improve on it by combining cocoa with my gingerbread recipe to create a chocolate version, and substituted milk for ginger beer.

This gingerbread is delicious by itself, dressed up with your favourite icing or used in trifle, which is what I will be doing later this week for Christmas.

Wishing you a very happy Christmas.

What I was cooking this time last year: Gingerbread Trifle

Chocolate Gingerbread

Ingredients

  • 2 cups self-raising flour
  • 1/4 cup cocoa powder
  • 2 teaspoons ground ginger
  • 1 teaspoon ground cinnamon
  • ½ teaspoon mixed spice
  • 1 cup ginger beer
  • 1 cup sugar
  •  2 eggs, lightly beaten
  • 125g butter
  • 1 cup golden syrup
  • Cooking oil spray

Method

  • Melt butter and syrup in saucepan over low heat until butter is melted and set aside to cool a little.

Butter and syrup

  • Sift the flour, cocoa & spices into a bowl.

Sift flour spice cocoa

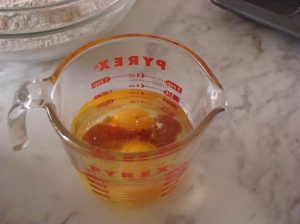
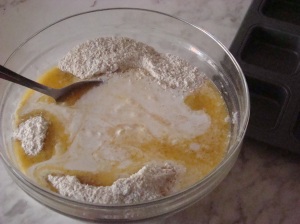
  • Add sugar, eggs, ginger beer and butter syrup and mix well.

Cake batter mixing

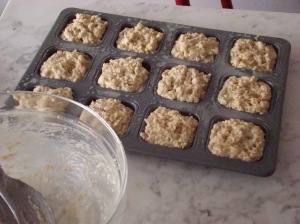
  • Spray your baking tin(s) with cooking oil spray. Pour cake batter into tins – I used mini-cupcake tins.

Chocolate cake batter in tins

  • Bake for 20 minutes at 170°C [fan-forced] or 180°C normal oven (you will need to adjust the cooking time if using larger tins). Remove from oven when cooked – ie skewer comes out clean or the gingerbread springs back with lightly touched.

Chocolate gingerbread

What is your favourite food that makes you happy? Has this post inspired any new ideas?

Leave a comment

Filed under Baking, Cake, Chocolate, Recipes, Spices, Sweet, Vegetarian

Christmas treats

In Sydney, Christmas falls in the middle of summer; this also happens to be when cherries are at their best. My recipe this week uses dried cherries, which I managed to track down at a local health food store, and pistachios, for their green christmasy colour. This recipe makes  a lot of fudge, so it is perfect for sharing and / or giving as home-made gifts to friends and family. I ended up making a double batch so that I would have plenty to go around. I wrapped squares of fudge in clear cello gift wrap then placed them in gift bags and boxes as presents.

With the salt quantity specified below, this is specifically for salt flakes, if you are using regular table salt proceed with caution and only use 1/4 of a teaspoon or less.

What I was cooking this time last year: Raspberry, Goat Cheese and Pistachio Salad

Chocolate Fudge with Cherries and Pistachios

Ingredients:

  • 75g butter
  • 395g tin condensed milk
  • 250g brown sugar
  • 1/2 teaspoon salt flakes
  • 1 teaspoon vanilla extract
  • 220g dark chocolate
  • 100g pistachios
  • 125g dried cherries
  • Cooking oil spray to grease your tin

Method

  • Pre-heat the oven on to 180°C.
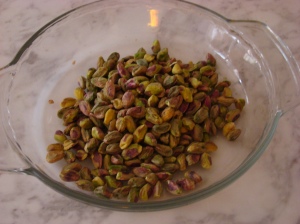
  • Transfer the pistachios to an oven proof dish and roast in the oven for 10 minutes, then set aside to cool.

Pistachios shelled green nuts

  • Line a tray with grease-proof paper and spray with cooking oil.
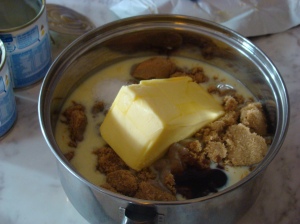
  • Add the butter, condensed milk, vanilla, salt and brown sugar to a saucepan.

Fudge ingredients


  • Stir the saucepan of fudge mixture over a medium heat until the butter is melted and the fudge starts to thicken.
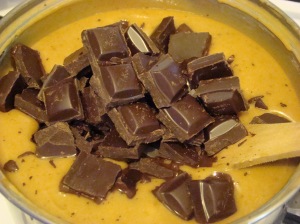
  • Remove the saucepan from the heat and add the chocolate. Stir to combine.

Chocolate caramel fudge

  • Add the cherries and pistachios to the chocolate fudge and stir to combine.
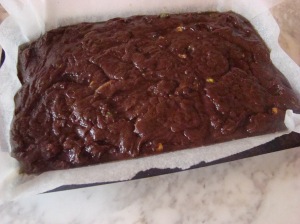
  • Pour the fudge into the lined tray and refrigerate until cool.

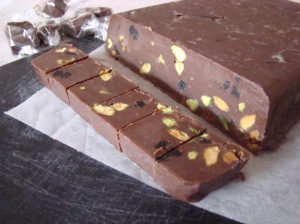
Chocolate cherry pistachio fudge

  • Remove the fudge from the tray and peel off the grease-proof paper.
  • Cut the fudge into serving size pieces. Your fudge is ready to serve or wrap for gifts. Enjoy.

Chocolate cherry pistachio fudge

What are your favourite christmas flavours? Has this post inspired any new ideas?

Leave a comment

Filed under Berries, Caramel, Chocolate, Dried Fruit, Nuts, Pistachio, Recipes, Sweet, Vegetarian

Rum

I’m freshly back from a wonderful trip to Cuba. While I didn’t discover many amazing foodie delights to share with you, the food I experienced in Cuba was fresh and plentiful, but a bit on the plain side. I did however get a chance to cement my love of mojitos, which I’m fairly sure will be my drink of choice this summer. I also discovered a Cuban cocktail new to me, the Canchánchara at a beach party just outside of Trinidad. The beach party was fabulous complete with bonfire, Cuban band, sun setting into the ocean and the cocktails flowing.

My highlights from Cuba include the proud and passionate people, the amazing architecture – either crumbling or painstakingly restored, the music and salsa dancing.

Beach Bonfire

Rum is cheap and plentiful in Cuba, and forms the basis for most Cuban cocktails. It is made with sugar cane or small guavas, ranging from white rums through to darker aged rums. Havana Club is the brand most easily obtained outside of Cuba, but Barcardi also originated in Cuba. This cocktail relies on a balance between sweet from the honey, sour from the lemon and a healthy kick from the rum. Lime and lemongrass can also be used instead of or as well as the lemon. Feel free to play with the ratios until you get a balance that is right for you. In the spirit of the margarita, and because of the heat in Cuba, you could also add a pinch of salt to replace some of the salts lost through sweating.

Havana Club Rum

What I was cooking this time last year: Seasame Shortbread

Canchánchara

Ingredients:

  • 2 teaspoons honey
  • 2 shots of white rum
  • 2 tablespoons lemon juice
  • Ice
  • Soda water or sparkling mineral water

Method

  • Add the honey, rum and lemon juice to a glass. Stir to combine.

Havana Cub Cocktail Rum Honey Lemon

  • Add ice and fill the glass with sparkling water. Stir. Enjoy.

Canchanchara Cocktail Havana Club

What is your favourite summer cocktail recipe? Has this post inspired any new ideas?

Leave a comment

Filed under Cocktail, Drink, Honey, Lemon, Recipes, Savoury, Sweet, Vegetarian

Retro

Some of the first recipes I learnt to perfect were from my mum’s Australian Women’s Weekly recipe card collection. It seems many Aussies have a soft spot for the Australian Women’s Weekly recipe card collection, and many of the recipes have stood the test of time. This caramel slice is always popular.

Caramel slice

To create a gluten free version of the slice and ensure none of my guests had to miss out, I used a biscuit crumb base instead of the details prescribed in the original recipe. I blitzed a 200g packet of gluten free biscuits with 100g of softened butter in a food processor, pressed this into the bottom of the lined baking tray and put in the fridge to chill before adding the caramel and chocolate layers.

In Australia, condensed milk currently comes in 400ml cans, I’ve included the 440ml can below as specified in the original recipe, but when I make the slice I just use the readily available 400ml can. Following the current trend for salted caramel, I added a generous pinch of salt to my caramel as it was cooking. The coconut specified refers to desiccated coconut. I also added extra chocolate, increasing to 200g of dark chocolate and 2 tablespoons of cooking oil instead of vegetable shortening for the topping. If you are using cooking oil, I recommend you select a neutral flavoured oil, I used rice bran oil. If you feel so inclined, you could scatter crumbled salt fakes over the top of the chocolate topping as extra decoration.

I recommend you bring your finished slice to room temperature before slicing if you have refrigerated it, otherwise the chocolate topping will be prone to cracking as you chop. The slice is quite rich, I suggest you cut into dainty portions – you can always go back for seconds or thirds if you still have room.

Australian Women's Weekly Recipe Card Collection

What I was cooking this time last year: Choc Malt Brownies

Carmel Chocolate Slice

* This recipe is the original Caramel Chocolate Slice recipe published by The Australian Women’s Weekly recipe cards.

Biscuit Base

  • 125g butter
  • 1 cup coconut
  • 1 cup self-raising flour
  • 1 cup brown sugar, lightly packed

Biscuit Base

  • Sift flour into bowl, add sugar and coconut, stir until combined.
  • Melt butter in pan, add to dry ingredients; mix well.
  • Press into greased 28cm x 18cm (11 in x 7 in) lamington tin.
  • Bake in moderate oven 10 minutes.
  • Remove from oven, spread with prepared Caramel.
  • Return to oven for further 10 minutes.
  • When cold, spread with Topping.
  • Cut into squares when set.

Caramel

  • 440g (14 oz) can condensed milk
  • 2 tablespoons golden syrup
  • 30g (1 oz) butter

Caramel ingredients

  • Place all ingredients into saucepan, stir over low heat until caramel has thickened, bringing slowly to boil, remove from heat.

Topping

  • Place 125g (4 oz) chopped dark chocolate and 30g (1 oz) solid white vegetable shortening in saucepan over hot water, stir until melted.

Chocolate topping

What is your favourite retro recipe? Has this post inspired any new (or old) ideas?

1 Comment

Filed under Baking, Biscuits, Caramel, Chocolate, Coconut, Pudding, Recipes, Sweet, Vegetarian

Spring Socialising

It’s hard to believe it’s November already. For me, November heralds the start of the party season and the count-down to Christmas. As your calendar starts to fill up, it’s handy to have some tasty recipes for entertaining.

I actually “borrowed” this recipe from a friend who recently purchased a thermomix. Now I love my kitchen gadgets, but haven’t been able to make the commitment to purchase one, but I’ve heard they are fantastic and she was excited to be experimenting with new recipes. I’ve added my own twist to the ingredients and come up with the below version (no thermomix required). I used a store-cupboard standby with the roasted peppers, but you could roast your own fresh red capsicum if you desire. If you would like a chunkier version of this dip, process the ingredients without the cashews first, then add the cashews and pulse the food processor until you achieve your desired texture. If your dip is a little to thick, you could add a bit of the drained oil that the tomatoes came in to help in getting the desired texture.

Serve your dip with your favourite accompaniments – crackers or vegetable crudités.

What I was cooking this time last year: Passionfruit and Strawberry Gum Bavarian

Cashew and Tomato Dip

Ingredients:

  • 100g semi-sundried tomatoes in oil, drained
  • 1 clove of garlic
  • 1 birds eye chilli
  • 50g roasted red peppers or roasted red capsicum, drained
  • 1 lemon, juiced
  • 120g raw unsalted cashews
  • 30g parmesan cheese

Method

  • Add the tomatoes, peppers, cashews, garlic, chilli, lemon juice and parmesan cheese to your food processor or thermomix bowl.

Cashews, tomato, pepper, chilli, garlic, cheese, ingredients

  • Blend until you have achieved your desired texture.
  • Transfer your dip to a bowl and serve (or refrigerate until ready to serve). Enjoy.

Cashew and tomato dip

What is your favourite stand-by recipe when friends drop by? Has this post inspired any new ideas?

Leave a comment

Filed under Capsicum, Cashews, Cheese, Dip, Lemon, Nuts, Recipes, Savoury, Tomato, Vegetarian

From my bookshelf – Family Food: A new approach to cooking

By the time you read this, I will be on my way to the international airport, bound for a Cuban holiday. I am hoping to discover some new dishes and ingredients as part of my trip, and come back inspired to create some new recipes to share with you all. I have set up posts to publish while I am away, so as long as technology doesn’t fail me, you should still receive your weekly Passionfruit Project fix.

This week’s post is dedicated to a review of the book ” Family Food: A new approach to cooking”, by Heston Blumenthal. This is the first recipe book Heston published, before he shot to prominence with his celebrity-chef television career and around the time The Fat Duck restaurant in Bray started to win awards.

I was lucky enough to have lunch at The Fat Duck many years ago now, and it still ranks as one of my best foodie experiences, along with dinner at Tetsuya’s. Heston is known for his unique approach to cooking, quite often combining scientific principles in his cooking methods. This book is removed from the high tech principles Heston has become famous for, and instead focuses on classic, simple cooking suitable for the whole family, young and old alike. It talks a lot about how to get children involved in cooking and interested in food, but it is also a handy reference for anyone wanting to brush up on their cooking techniques, fill in any gaps, find some new inspiration or rediscover a classic dish. In this book Heston’s passion for food shines through, and he covers a full spectrum of dishes, from how to fry the perfect egg to strawberry soup.

A quote to give you a flavour of the book, “One of the main ambitions of this book is to bring children into the kitchen, and one of the best ways to do this is to make cooking as approachable as possible” from the Children’s tip in the section “Risotto”. The below recipe is quite labour and time intensive, and combines some unusual ingredients, but there are also plenty of more traditional recipes if you aren’t feeling like experimenting. I will confess, I haven’t actually attempted the below recipe, or tried the strawberry and black pepper combo that many chefs seem to be a fan of. I included the details to give you a sense of the book.

What I was cooking this time last year: Mini smoked salmon and cream cheese bagels (please note, Glick’s has moved)

Family Food book Heston Blumenthal

Strawberry Soup

* This recipe is from the chapter “Desserts” by Heston Blumenthal  in “Family Food: A new approach to cooking”.

“This recipe is part of a dish that is on the menu at the Fat Duck in season. Do give it a try, but please do it in the strawberry season. As well as quality, there is something quite magical about eating this during the English summer. Make sure that you buy the fruit no more than a day in advance, as they deteriorate really quickly.

* Children’s tip
Show the children how to spot a good strawberry – bright red in colour with a vivid green stem. Check that there are no blemishes or bruises on the strawberries. Contrary to popular belief, large, uniform strawberries are not a sign of quality. More often than not they are a result of laboratory-controlled agriculture.

If orange-flower water is not available, use rose water, which most chemists sell. Both of these ingredients are optional. You might want to omit the flower water the first time that you make this, as it could be too perfumed for your kids. Although, having said that, orange-flower water is still used to make a soothing sugared child’s drink in many parts of Europe. In Spain, it is also put on children’s pillows to give a comforting night-time aroma.

This recipe may seem rather lengthy, but the results will not disappoint. The concentration of flavour is amazing.

The strawberry juice can be omitted, although it is great as a base for making drinks or for pouring over ice-cream. It can even be added to the rice pudding recipe on page 305. It does keep very well.

* Tip
Even if you are a bit short of time and cannot do this recipe, you will be surprised at how much the flavour of the strawberries can be heightened just by sprinkling some unrefined caster sugar over them half an hour before serving. If you have not read it already, have a quick read of the findings of a recent experiment regarding strawberries on page 71.

Remember, when preparing strawberries, to hull them just before you macerate or use them. Do not wash them before hulling, or they will absorb water, destroying their taste and texture.

Try this recipe replacing the strawberries with rhubarb – it works brilliantly.

If doing the whole recipe, including the juice begin the day before. Some muslin will also be needed.

For the strawberry juice

  • 500g strawberries
  • 1 tablespoon icing sugar
  • 1 tablespoon water

Wash, hull and quarter the strawberries, put them into a metal bowl and sprinkle them with the icing sugar. Set this bowl over a saucepan of very gently simmering water, cover with cling-film, and leave for 1 1/2 hours. Pour the contents of the bowl on to a large piece of muslin set over a bowl. Tie up the corners of the muslin and hang up over the bowl to catch all of the juice.

For the soup

  • 500g strawberries
  • 1 tablespoon unrefined caster sugar
  • strawberry juice (see above)
  • 1 orange
  • 1 lemon
  • 125ml fruity red wine
  • orange-flower water to taste
  • freshly ground black pepper
  • extra virgin olive oil

Hull and quarter the strawberries and put them into a bowl. Add the sugar and pour over the strawberry juice, leave this mix to macerate for 2 hours.

Zest the orange and lemon, taking care to discard all of the white pith which would make the liquid bitter. Juice the fruits and reserve.

Meanwhile, bring the red wine to the boil and immediately flame it with a match, or better still, a blowtorch. When the flames have cased, add the zest and juice of the orange and lemon and boil to reduce the mixture by half. Strain this liquid and set aside to cool.

In the liquidizer, combine the macerated strawberries with the red wine reduction and blend.

Finishing the dish is the fun part, as it involves the taste-buds. Add the orange-flower water, about 1 tablespoon to begin with. A little more sugar may be needed along with some orange juice, depending on the ripeness and quality of the strawberries. The important thing here is to keep on tasting to get the right balance. Give the soup a really good blend and finish off by adding the black pepper to taste.

Now there are the following options:

  1. Hang the soup in muslin again overnight. This will produce a wonderfully concentrated essence of strawberry.
  2. Pass the soup through a fine-mesh sieve.
  3. Serve it as it is, adding extra strawberries for texture if required.

To serve, dribble over a little best-quality virgin olive oil. Finally, if feeling adventurous, finish the dish by sprinkling over some freshly picked rose petals!”

Strawberry Soup recipe Family Food Heston Blumenthal

What is your favourite go-to cook book? Has this post inspired any new ideas?

1 Comment

Filed under Berries, Book Review, Pudding, Recipes, Rhubarb, Soup, Strawberry, Sweet

Crazy as a coconut

Banana bread has become a breakfast staple in cafés. A coconut bread recipe by Bill Granger was the inspiration for my recipe this week. I’ve changed ingredients and swapped it from a loaf to muffins, to come up with the below recipe.

I’ve packed in triple coconut, with desiccated coconut, coconut milk and coconut oil. Coconut oil is sometimes referred to as coconut butter, they are the same thing. If your coconut oil becomes solid, it can easily be melted my standing the jar in some hot water from the kettle and it will return to liquid again. Coconut oil is reported to be a good oil, with lots of health benefits, and works well in baking.

Coconut oil butter

If you are not a confident baker, muffins are the perfect thing to try making to build up your confidence. No fancy equipment is needed for mixing the batter. In fact, the less mixing you do, the better. It’s also a good recipe to get the kids involved with.

The salt quantity below is based on using fine salt flakes, if you are using regular table salt you will need to reduce the amount you include – adjust to taste but start off cautiously. If you need to reduce or limit your salt intake, you can of course skip the salt.

Delicious served warm straight from the oven, with a slather of butter or just as they are. Suitable for breakfast, morning or afternoon tea or a snack. Any leftovers can be frozen and zapped for a few seconds in the microwave to warm through again.

What I was cooking this time last year: Strawberry and White Chocolate Mousse

Coconut Muffins

* This recipe was adapted from a Coconut Bread recipe by Bill Granger. I have modified and adapted it to come up with the below reincarnation.

Makes 12 muffins

Ingredients:

  • 2 eggs
  • 300mls coconut milk
  • 1 teaspoon vanilla extract
  • 350g self-raising flour
  • 1 teaspoon mixed spice
  • 100g brown sugar
  • 150g shredded coconut
  • 75mls coconut oil
  • 1/2 teaspoon salt flakes
  • Cooking oil spray to grease your muffin tin

Method

  • Pre-heat the oven on to 180°C.
  • Add the dry ingredients (flour, mixed spice, coconut, salt and brown sugar) to a large bowl. Stir to combine.

Muffin dry ingredients

  • Add the coconut oil, eggs and vanilla to a measuring jug and mix to combine. Add the liquid to the dry ingredients in the bowl.

Eggs, oil, vanilla

  • Measure out 300mls coconut milk and add to the dry ingredients in the bowl.

Muffing batter ready to be mixed

  • Stir until the mixture is just combined, being careful not to over-mix.
  • Spray a muffin or cupcake tin with cooking spray.
  • Pour the batter into the muffin tray.

Muffin batter in tray

  • Cook your muffins in the oven for 20 – 25 minutes or until cooked through (test by pressing lightly on the middle of a muffin, it should bounce back, or when you insert a skewer into the center it comes out clean without any batter stuck to it).
  • Remove from the oven, and serve still warm, or allow to cool in the muffin tray. Enjoy.

DSC07609

What is your favourite breakfast recipe? Has this post inspired any new ideas?

1 Comment

Filed under Baking, Breakfast, Cake, Coconut, Recipes, Spices, Sweet, Vegetarian

Picnic in the park

I was meeting friends in Centennial Park today for a baby shower picnic, and was responsible for bringing dips. I wanted to bring one of my favourite dips, tzatziki. After researching different recipes, it seems the secret with this dip is to keep things simple. I was thinking of experimenting with the addition of spices, but the only things that seem to be added are a generous amount of salt and pepper, and either mint or dill. I went with adding both herbs, and some lemon zest and lemon infused olive oil for an extra citrus kick.

The raw garlic actually adds a bit of heat to the dip, so taste as you go when adding the garlic and pepper. Some recipes ask you to peel the cucumber and / or scoop out the seeds, I didn’t but instead allowed the yoghurt and grated cucumber to drain to remove some of the excess liquid. Suspend your strainer over a bowl to allow the liquid to drip through.

Serve this dip with your favourite crackers, or vegetable crudités (I used celery and carrot sticks) or as part of a Middle-Eastern inspired feast.

What I was cooking this time last year: Asian Marinated Salmon

Tzatziki Dip

Ingredients:

  • 1 cup natural greek-style yoghurt
  • 1 cucumber
  • Zest of 1 lemon
  • 1 tablespoon olive oil (I used lemon infused)
  • 1 garlic clove, finely crushed
  • 1 tablespoon finely chopped fresh mint leaves
  • 1 tablespoon finely chopped fresh dill leaves
  • Salt and pepper to taste

Method

  • Grate the cucumber and add to a suspended strainer.
  • Add the yoghurt to the grated cucumber in the strainer and set aside for the excess liquid to drip through.

Yoghurt and cucumber straining

  • Set aside the draining yoghurt and grated cucumber for half-an-hour while you prepare your vegetable crudités.
  • Discard the liquid and add the yoghurt and grated cucumber to the blow.
  • Grate the lemon zest and finely mince the garlic and add to the bowl.
  • Add the finely chopped mint, dill, olive oil and salt and pepper to taste.

Tzatziki ingredients

  • Mix with a spoon until everything is combined.
  • Transfer your dip to a bowl and serve (or refrigerate until ready to serve). Enjoy.

Tzatziki dip celery carrot crudité

What is your favourite dip? Has this post inspired any new ideas?

2 Comments

Filed under Dip, Herbs, Lemon, Recipes, Savoury, Vegetarian

Poppy Seed cake

In preparation for embracing the “Swank Diet” in the new year, I am taking steps to wean myself off certain favourite foods. A lot of the diets books I have been reading say it is important not to put your body through sudden and / or drastic changes, so I am currently cutting back on coffee and dairy products, and if I am eating dairy, using low-fat or no-fat versions. If you are regular follower of this blog, you may have detected that I love baking and I believe cake should be classified as its’ own food group. The inspiration for this recipe is to come up with a cake that doesn’t use butter. I wouldn’t go as far as saying it’s healthy, but for me, it’s a step in the right direction.

The cake has been drowned in a sticky syrup, which you could skip if you want or need to reduce your sugar intake. Delicious served warm alongside a scoop of fat free natural yoghurt.

Lemon poppy seed

What I was cooking this time last year: Veggie Burgers

Lemon Poppy Seed Yoghurt Cake

Ingredients:

Cake

  • 2 cups self-raising flour
  • 3/4 cup raw sugar
  • 1 cup zero fat yoghurt
  • 1/2 cup rice bran oil (or other vegetable oil)
  • 2 lemons
  • 3 eggs
  • 1 teaspoons vanilla extract
  • Generous pinch salt
  • 4 tablespoons poppy seeds

Lemon Syrup

  • 2 lemons
  • 1/2 cup raw sugar
  • Water

Method

  • Turn the oven on to 180°C to pre-heat.
  • Add the flour, sugar, eggs, salt, vanilla, lemon zest, yoghurt and oil to your food processor bowl.
  • Juice the zested lemons, and add 1/2 cup lemon juice to the food processor bowl.

DSC07542

  • Mix until the cake batter is combined.
  • Add the poppy seeds to the food processor bowl and pulse until mixed into the cake batter.

Poppy seed cake batter

  • Grease a cake tin.
  • Pour the cake mix into your greased cake tin, and set a timer for 45 minutes (you may need to adjust the cooking time depending on your oven and cake tin size).

Poppy seed cake batter

  • To make the syrup zest 2 lemons to produce long strips of zest. Add to a saucepan.

Lemon zest strips

  • Juice the lemon, to create 1/4 cup lemon juice, add 1/4 cup of water and add to the saucepan.
  • Add 1/2 cup of sugar to the lemon zest and juice mix.

Lemon syrup

  • Cook the syrup mixture over a medium heat until the sugar is dissolved and the mixture comes to the boil.
  • Take the syrup off the heat and set aside to cool.
  • Once the cake is cooked, remove from the tin and pour over the syrup while the cake is still hot.
  • Serve warm or once cooled. Enjoy.

Lemon Poppy Seed Yoghurt Cake

What is your favourite healthy(ish) cake recipe? Has this post inspired any new ideas?

2 Comments

Filed under Baking, Cake, Lemon, Pudding, Recipes, Sweet, Vegetarian

Nutty

It is a long weekend in Sydney. The October long weekend is when daylight savings time kicks in, and the weekend that heralds the start of summertime.  A lot of Sydneysiders use the opportunity to make a pilgrimage out of the city and head up the coast. Staying at a friend’s place for the weekend, and the start of BBQ season is the inspiration for this recipe, Marinated Fish skewers with Satay Sauce.

I used Monkfish for my skewers, as recommended by my fish monger. You could use chicken, tofu or prawns instead of fish if you prefer. Kecap manis is a thick, Indonesian soy sauce, normally found in the Asian section of your supermarket. Kaffir lime leaves add a citrus tang. You can add chilli to taste to the sauce – I like things spicy so added more to make sure there was a bit of heat to the sauce. This is not an authentic Indonesian or Balinese recipe, because I have added ginger to the marinade and sauce, but I think the flavours work well together.

It was hard to get an appetising photograph of the satay sauce, but I assure you it tastes delicious and quite different to anything you buy from the supermarket out of a jar or bottle.

Serve your skewers with the satay sauce as a snack on their own, or with rice, salad or vegetables for a more substantial meal.

What I was cooking this time last year: Guacamole

Marinated Fish Skewers with Satay Sauce

Serves 4

Ingredients:

Fish Skewers

  • 1kg monkfish fillets
  • 5 cloves of garlic, crushed or finely chopped
  • 2 heaped teaspoon grated ginger
  • 5 kaffir lime leaves, shredded finely
  • 4 tablespoons coconut oil
  • 4 tablespoons kecap manis (sweet soy sauce)
  • wooden skewers

Satay Sauce

  • 150g raw unsalted peanuts
  • 4 cloves of garlic, crushed or finely chopped
  • 1 teaspoon grated ginger
  • 2 tablespoons coconut oil
  • 1 large tomato
  • 2 tablespoons kecap manis (sweet soy sauce)
  • 2 red chillies, or to taste
  • 4 kaffir lime leaves, finely shredded
  • 1/4 – 1/2 cup warm water

Method

  • Soak the wooden skewers in water. This prevents them burning when they are being cooked.
  • Add the shredded kaffir lime leaves, garlic, ginger, oil and kecap manis to a bowl.

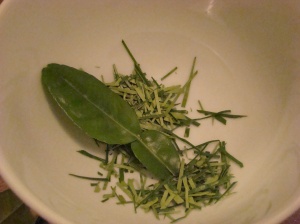
Kaffir lime leaves

  • Chop the fish into cubes and add to the bowl.
  • Toss to coat the fish in the marinade, set aside to soak up the flavours while you prepare the satay sauce.

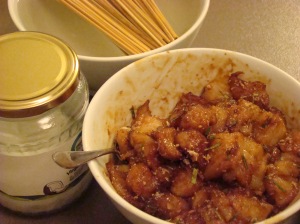
Fish skewers

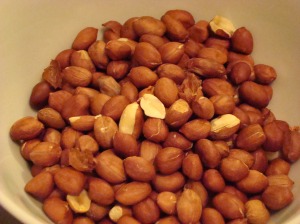
  • Heat the coconut oil in a saucepan and add the raw peanuts.

Raw peanuts

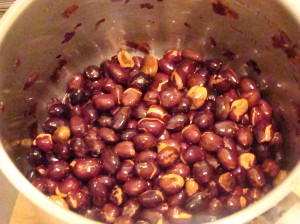
  • Cook the peanuts, stirring regularly, until lightly golden brown. Set aside to cool. (The peanuts will continue to cook once they are removed from the heat so don’t allow them to get too golden brown when they are on the heat.)

cooked peanuts

  • Add the garlic, ginger, chillies, tomato, kecap manis kaffir lime leaves and peanuts to a blender jug. Add 1/4 cup of warm water.

blender kaffir lime tomato

  • Blend the sauce until smooth and combined. Taste, if required add more chilli or water until you are happy with the heat and thickness of the sauce.
  • Transfer your satay sauce to a bowl and set aside.

Satay sauce

  • Thread the cubes of marinated fish onto the soaked skewers.

Raw fish skewers

  • On the BBQ or a medium-hot frying pan, cook your fish skewers for a couple of minutes on one side.
  • Turn and cook for a minute or two on the other side, or until cooked through.
  • Serve the cooked fish skewers alongside the satay sauce. Enjoy.

DSC07529

What is your favourite BBQ recipe? Has this post inspired any new ideas?

2 Comments

Filed under Peanuts, Recipes, Savoury, Seafood