Category Archives: Chocolate

Happy Christmas

Christmas is a time for gratitude, remembering all those things you are thankful for, and indulging in things that make you happy, spending time with loved ones and overdosing on favourite foods. I have a lot to be grateful for, and one thing that is high on my happiness list is chocolate. I decided to revisit a recipe from last year and improve on it by combining cocoa with my gingerbread recipe to create a chocolate version, and substituted milk for ginger beer.

This gingerbread is delicious by itself, dressed up with your favourite icing or used in trifle, which is what I will be doing later this week for Christmas.

Wishing you a very happy Christmas.

What I was cooking this time last year: Gingerbread Trifle

Chocolate Gingerbread

Ingredients

  • 2 cups self-raising flour
  • 1/4 cup cocoa powder
  • 2 teaspoons ground ginger
  • 1 teaspoon ground cinnamon
  • ½ teaspoon mixed spice
  • 1 cup ginger beer
  • 1 cup sugar
  •  2 eggs, lightly beaten
  • 125g butter
  • 1 cup golden syrup
  • Cooking oil spray

Method

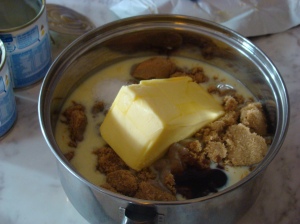
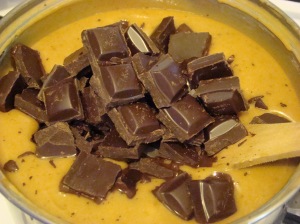
  • Melt butter and syrup in saucepan over low heat until butter is melted and set aside to cool a little.

Butter and syrup

  • Sift the flour, cocoa & spices into a bowl.

Sift flour spice cocoa

  • Add sugar, eggs, ginger beer and butter syrup and mix well.

Cake batter mixing

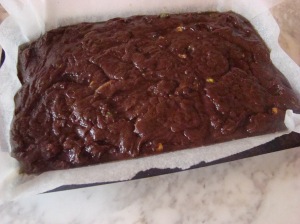
  • Spray your baking tin(s) with cooking oil spray. Pour cake batter into tins – I used mini-cupcake tins.

Chocolate cake batter in tins

  • Bake for 20 minutes at 170°C [fan-forced] or 180°C normal oven (you will need to adjust the cooking time if using larger tins). Remove from oven when cooked – ie skewer comes out clean or the gingerbread springs back with lightly touched.

Chocolate gingerbread

What is your favourite food that makes you happy? Has this post inspired any new ideas?

Leave a comment

Filed under Baking, Cake, Chocolate, Recipes, Spices, Sweet, Vegetarian

Christmas treats

In Sydney, Christmas falls in the middle of summer; this also happens to be when cherries are at their best. My recipe this week uses dried cherries, which I managed to track down at a local health food store, and pistachios, for their green christmasy colour. This recipe makes  a lot of fudge, so it is perfect for sharing and / or giving as home-made gifts to friends and family. I ended up making a double batch so that I would have plenty to go around. I wrapped squares of fudge in clear cello gift wrap then placed them in gift bags and boxes as presents.

With the salt quantity specified below, this is specifically for salt flakes, if you are using regular table salt proceed with caution and only use 1/4 of a teaspoon or less.

What I was cooking this time last year: Raspberry, Goat Cheese and Pistachio Salad

Chocolate Fudge with Cherries and Pistachios

Ingredients:

  • 75g butter
  • 395g tin condensed milk
  • 250g brown sugar
  • 1/2 teaspoon salt flakes
  • 1 teaspoon vanilla extract
  • 220g dark chocolate
  • 100g pistachios
  • 125g dried cherries
  • Cooking oil spray to grease your tin

Method

  • Pre-heat the oven on to 180°C.
  • Transfer the pistachios to an oven proof dish and roast in the oven for 10 minutes, then set aside to cool.

Pistachios shelled green nuts

  • Line a tray with grease-proof paper and spray with cooking oil.
  • Add the butter, condensed milk, vanilla, salt and brown sugar to a saucepan.

Fudge ingredients


  • Stir the saucepan of fudge mixture over a medium heat until the butter is melted and the fudge starts to thicken.
  • Remove the saucepan from the heat and add the chocolate. Stir to combine.

Chocolate caramel fudge

  • Add the cherries and pistachios to the chocolate fudge and stir to combine.
  • Pour the fudge into the lined tray and refrigerate until cool.

Chocolate cherry pistachio fudge

  • Remove the fudge from the tray and peel off the grease-proof paper.
  • Cut the fudge into serving size pieces. Your fudge is ready to serve or wrap for gifts. Enjoy.

Chocolate cherry pistachio fudge

What are your favourite christmas flavours? Has this post inspired any new ideas?

Leave a comment

Filed under Berries, Caramel, Chocolate, Dried Fruit, Nuts, Pistachio, Recipes, Sweet, Vegetarian

Retro

Some of the first recipes I learnt to perfect were from my mum’s Australian Women’s Weekly recipe card collection. It seems many Aussies have a soft spot for the Australian Women’s Weekly recipe card collection, and many of the recipes have stood the test of time. This caramel slice is always popular.

Caramel slice

To create a gluten free version of the slice and ensure none of my guests had to miss out, I used a biscuit crumb base instead of the details prescribed in the original recipe. I blitzed a 200g packet of gluten free biscuits with 100g of softened butter in a food processor, pressed this into the bottom of the lined baking tray and put in the fridge to chill before adding the caramel and chocolate layers.

In Australia, condensed milk currently comes in 400ml cans, I’ve included the 440ml can below as specified in the original recipe, but when I make the slice I just use the readily available 400ml can. Following the current trend for salted caramel, I added a generous pinch of salt to my caramel as it was cooking. The coconut specified refers to desiccated coconut. I also added extra chocolate, increasing to 200g of dark chocolate and 2 tablespoons of cooking oil instead of vegetable shortening for the topping. If you are using cooking oil, I recommend you select a neutral flavoured oil, I used rice bran oil. If you feel so inclined, you could scatter crumbled salt fakes over the top of the chocolate topping as extra decoration.

I recommend you bring your finished slice to room temperature before slicing if you have refrigerated it, otherwise the chocolate topping will be prone to cracking as you chop. The slice is quite rich, I suggest you cut into dainty portions – you can always go back for seconds or thirds if you still have room.

Australian Women's Weekly Recipe Card Collection

What I was cooking this time last year: Choc Malt Brownies

Carmel Chocolate Slice

* This recipe is the original Caramel Chocolate Slice recipe published by The Australian Women’s Weekly recipe cards.

Biscuit Base

  • 125g butter
  • 1 cup coconut
  • 1 cup self-raising flour
  • 1 cup brown sugar, lightly packed

Biscuit Base

  • Sift flour into bowl, add sugar and coconut, stir until combined.
  • Melt butter in pan, add to dry ingredients; mix well.
  • Press into greased 28cm x 18cm (11 in x 7 in) lamington tin.
  • Bake in moderate oven 10 minutes.
  • Remove from oven, spread with prepared Caramel.
  • Return to oven for further 10 minutes.
  • When cold, spread with Topping.
  • Cut into squares when set.

Caramel

  • 440g (14 oz) can condensed milk
  • 2 tablespoons golden syrup
  • 30g (1 oz) butter

Caramel ingredients

  • Place all ingredients into saucepan, stir over low heat until caramel has thickened, bringing slowly to boil, remove from heat.

Topping

  • Place 125g (4 oz) chopped dark chocolate and 30g (1 oz) solid white vegetable shortening in saucepan over hot water, stir until melted.

Chocolate topping

What is your favourite retro recipe? Has this post inspired any new (or old) ideas?

1 Comment

Filed under Baking, Biscuits, Caramel, Chocolate, Coconut, Pudding, Recipes, Sweet, Vegetarian

Zesty

One of my all time favourite flavours is lemon. When I was making the Australian Women’s Weekly classic, Caramel Chocolate Slice recently, I was inspired to try a citrusy version. This slice is my Lemon and White Chocolate Slice.

I like to use the zest and well as the juice of lemons to give an extra citrus boost when I am cooking. Cooking the lemon filling is more to cook out the egg yolks than to actually thicken the curd, the reaction between the lemon juice and condensed milk when mixing without any heat produces a thick filling. With the cooking oil you use, I recommend you select a neutral flavoured oil, I used rice bran oil.

I recommend you bring your finished slice to room temperature before slicing if you have refridgerated it, otherwise the chocolate topping will be prone to cracking as you chop (I learnt this the hard way, and the firm chocolate caused the lemon filling to ooze out a little). The slice is quite rich, you I recommend you cut into dainty portions – you can always go back for seconds or thirds if you still have room.

What I was cooking this time last year: Banoffee Pie

Lemon and White Chocolate Slide

* This recipe was adapted from a Caramel Chocolate Slice recipe by The Australian Women’s Weekly recipe cards. I have modified and adapted it to come up with the below reincarnation.

Ingredients:

Biscuit Base

  • 120g butter
  • 1 cup rolled oats
  • 1/2 cup plain flour
  • 1/2 cup self-raising flour
  • 1 cup brown sugar, lightly packed

Filling

  • 400g can condensed milk
  • 2 lemons
  • 2 egg yolks
  • Generous pinch of salt

Chocolate topping

  • 22og white chocolate
  • 1 tablespoon cooking oil

Method

  • Turn the oven on to 180°C. to pre-heat.
  • Melt the butter in a saucepan over a low heat.
  • Add the oats, flours, brown sugar and melted butter to a food processor bowl. Mix the biscuit base mixture until combined.
  • Line a baking tray with grease-proof paper.
  • Tip the biscuit base mixture into the lined baking tray, and press out evenly over the base of the tray.

Biscuit base slice mixture

  • Cook the biscuit base in the oven for 10 minutes.
  • Remove the biscuit base from the oven and set aside to cool.
  • Add the condensed milk to the saucepan used to melt the butter.
  • Zest and juice the lemons and add to the condensed milk in the saucepan.
  • Add the 2 egg yolks and salt to the saucepan and mix everything to combine.

Lemon curd ingredients

  • Cook the lemon filling over a medium-low heat, stirring constantly until the mixture is hot. Continue cooking for a further two minutes to ensure the egg yolks are cooked.

DSC07486

  • Pour the hot lemon filling over the biscuit base, spread out to create an even layer. Set aside to cool.
  • Add the white chocolate and cooking oil to a large bowl.

White chocolate melting

  • Suspend the bowl over a saucepan of hot water and gently heat until the chocolate is melted and everything is combined.
  • Pour the white chocolate over the lemon filling layer, spread out to create an even layer. Set aside to cool.
  • Remove the lemon slice from the baking tray and cut into serving size pieces. Enjoy.

Lemon White Chocolate Slice

What is your favourite lemon recipe? Has this post inspired any new ideas?

Leave a comment

Filed under Baking, Biscuits, Chocolate, Lemon, Pudding, Recipes, Sweet, Vegetarian

Protein punch

When I came across a recipe in the Sydney Morning Herald’s Good Food section that used a tin of red kidney beans to produce a gluten-free chocolate cake, to say I was dubious is an understatement. Curiosity got the better of me however, so I decided to give it a try. I shared my experiment with my family, because I knew I would be guaranteed an honest opinion – my brother is never one to hold back with his reaction. I doubled the original recipe and split the mix among three cake tins to create a triple layer cake The result was a success, a fudge cake that I smothered in dark chocolate icing with white chocolate cream between the layers. I didn’t tell everyone about my secret ingredient, and everyone was genuinely surprised when I revealed the details. A great way to sneak in extra protein for kids or vegetarians, and of course, a perfect recipe to cater for those that are gluten-free. Feel free to decorate.

Tip: make sure the cocoa powder is gluten-free if you are catering for those that are intolerant.

What I was cooking this time last year: Zucchini Fritters

Chocolate Fudge Cake

* The basic cake recipe ingredients list is taken from a recipe by Debbie Skelton that appeared in the Sydney Morning Herald’s Good Food section on 7 August 2013.

Ingredients:

Cake

  • 2 x 420g tins of red kidney beans, drained
  • 2 tablespoons espresso coffee
  • 2 tablespoons vanilla paste
  • 10 eggs, at room temperature
  • 250g softened butter, plus extra to grease your cake tins
  • 320g sugar
  • 140g cocoa powder
  • 1/2 teaspoon salt flakes
  • 2 teaspoons gluten free-baking powder
  • 1 teaspoon baking soda

White Chocolate Cream

  • 100g white chocolate
  • 300mls cream
  • 1/2 tin condensed milk (approx 200mls)

Dark Chocolate Ganache Icing

  • 220g dark chocolate
  • 300mls cream
  • 1/2 tin condensed milk (approx 200mls)

Method:

Cake

  • Turn the oven on to 180°C.

DSC07372

  • In a food processor, purée the kidney beans, coffee, vanilla and two eggs until smooth.

Red kidney beans eggs

  • Add the butter and sugar and process until smooth.

Butter and sugar

  • Add the remaining eggs, two at a time, processing until smooth.
  • Add the cocoa powder, baking powder, baking soda and salt and process until smooth.
  • Cut grease-proof paper to size to fit the bottom of three cake tins.
  • Grease the three cake tins and line the bottoms with the grease-proof paper discs.
  • Divide the cake mixture between the three cake tins and smooth out to encourage them to cook evenly.

Chocolate cake batter

  • Cook in the oven for approximately 30 minutes or until a skewer inserted into the cake comes out clean.
  • Remove the cakes from the oven once cooked and allow to cool in their tins.

White Chocolate Cream

  • To make the white chocolate cream, add the white chocolate, cream and condensed milk to a large bowl.
  • Suspend the bowl over a saucepan of hot water and gently heat until the chocolate is melted and everything is combined. Allow the chocolate ganache to chill completely in the fridge.
  • Once the white chocolate mixture has chilled, beat the cream until thick.

White chocolate cream

Chocolate Ganache Icing

  • To make the chocolate ganache icing, add the dark chocolate, cream and condensed milk to a large bowl.
  • Suspend the bowl over a saucepan of hot water and gently heat until the chocolate is melted and everything is combined. Allow the chocolate ganache to cool to room temperature.

Assembly

  • To assemble, place one cake on your serving plate.
  • Top with half of the white chocolate cream, and spread the cream across the top of the cake.
  • Add the next cake on top of the white chocolate cream layer.
  • Add the remaining white chocolate cream, and spread the cream across the top of the cake.

Tripple layer chocolate cake cream

  • Add the final cake to the top of the second layer of cream.
  • Top the layered cake with dark chocolate ganache icing, and spread to cover the top and sides of the cake.

Chocolate cake assembly

  • Allow to chill in the fridge until ready to serve. Enjoy.

Chocolate mud cake

What is your favourite chocolate cake recipe? Has this post inspired any new ideas?

2 Comments

Filed under Baking, Cake, Chocolate, Recipes, Sweet, Vegetarian

Gooey caramel

One of my all time favourite desserts is Nigella’s Molten Chocolate Babycakes. I wanted to play with this recipe and come up with a caramel version.

The salt quantity below is based on using fine salt flakes, if you are using regular table salt you will need to reduce the amount you include – adjust to taste but start off cautiously.

Babycakes are best cooked to order just before you are ready to serve. The original chocolate and these caramel puddings can be frozen before cooking (if you happen to have any such thing as extras), so that you have them on standby for emergencies. You will just need to add a couple of extra minutes to the cooking time if cooking straight from the freezer. You also may need to play with the cooking times depending on your oven, you want a cooked pudding that will turn out of its mould intact but retaining its gooey centre. Delicious with whipped cream or ice-cream.

What I was cooking this time last year: Pumpkin Cannelloni

Salted Caramel Babycakes

* This recipe was adapted from a Molten Chocolate Babycakes recipe by Nigella Lawson. I have modified and adapted it to come up with the below reincarnation.

Serves 6

Ingredients:

  • 50g butter, softened
  • 350g white chocolate
  • 150g brown sugar
  • 4 large eggs
  • 1/2 teaspoon salt flakes
  • 1 teaspoon vanilla extract
  • 50g plain flour
  • Cooking oil spray to grease your cake tin

Method

  • Add the white chocolate and brown sugar to a large bowl.

White chocolate and brown sugar

  • Suspend the bowl over a saucepan of hot water and gently heat until the chocolate is melted and everything is combined. Allow the chocolate to cool slightly.
  • Add the butter, vanilla, eggs, salt and plain flour to your food processor bowl. Blend until combined.

Cake ingredients

  • Add the chocolate sugar mixture to the food processor and blend until combined.
  • Spray 6 moulds with cooking spray, and you may want to line the bottom of each mould with a disc of grease-proof paper cut to size.
  • Divide the batter between the 6 moulds.

Caramel pudding

  • When ready to cook, pre-heat the oven on to 200°C.
  • Cook your baby cake(s) for 12 – 15 minutes.

DSC07353

  • Remove from the oven, run a knife around the outside of the cakes to loosen from the mould, then tip out onto small plates or shallow bowls.
  • Serve with whipped cream or ice-cream. Enjoy.

Caramel pudding with ice-cream

What is your favourite gooey recipe? Has this post inspired any new ideas?

1 Comment

Filed under Baking, Cake, Chocolate, Pudding, Recipes, Sweet, Vegetarian

Cheat chocolate tarts

It is my nephew’s first birthday party tomorrow, and my brother put in an order for macaroons. I ran out of time and energy this week, so I will have to politely decline his request (for now). Instead, I opted for a quick and easy, kid-friendly recipe. The tart base is something I learnt about on the Arnott’s website, and can easily be adapted to include whichever fillings you like or have available, banoffee pies, curd (lemon, peach or passionfruit) or chocolate. You could also experiment with different biscuits, and I also used a gluten-free ginger snap to make sure my sister-in-law didn’t miss out. The chocolate tarts could be topped with berries instead of sprinkles for a more grown-up version.

You will need 2 round bottomed tins, one to re-heat the biscuits, one to weigh them down once they are soft.

Arnott's Butternut Snap Cookies

What I was cooking this time last year: Pumpkin cannelloni

Chocolate tarts

Ingredients:

  • 1 packet Arnott’s Butternut Snap Cookies
  • 300mls cream
  • 220g chocolate
  • 100g condensed milk
  • Chocolate sprinkles to decorate

Method:

  • Turn the oven on to 150°C.
  • Add a biscuit over each hole of a round based tartlet tin (you may need to do this in 2 batches).

Biscuit tart cases

  • Cook in the oven for 10 minutes or until the biscuits soften.
  • Place another round based tartlet tin over the biscuits and push down to encourage the biscuits to form into a tart shape.
  • Weigh down the top tray with a couple of tins until the biscuit tart cases have cooled.

Tart tin

  • Remove the cooled biscuit tart cases from the tin.
  • Repeat the biscuit moulding process until you have used all the biscuits.
  • To make the chocolate ganache filling, add the chocolate, cream and condensed milk to a large bowl.

Chocolate and cream

  • Suspend the bowl over a saucepan of hot water and gently heat until the chocolate is melted and everything is combined. Allow the chocolate ganache to cool slightly.
  • Fill the biscuit tart cases with chocolate ganache and refrigerate until the filling sets.

Chocolate tarts being filled

  • Sprinkle the top of your chocolate tarts with sprinkles.
  • Your tarts are ready to serve. Enjoy.

Chocolate sprinkle tarts

What is your favourite kids party food? Has this post inspired any new ideas?

1 Comment

Filed under Baking, Biscuits, Chocolate, Recipes, Sweet, Vegetarian

Birthday cake

I was inspired by this cake by Raspberri Cupcakes, and my friend’s upcoming birthday celebration.

I started off with a classic butter cake, and doubled it. The cake recipe came from my Australian Women’s Weekly recipe card collection, but it is a classic cake so similar details can be found in various recipes. I use raw sugar in my cooking, because it’s less processed. I used 5 cake tins to make this cake, if you don’t have that many tins you can cook the cakes in shifts. I was sparing with the food colouring to start with, but ended up needing to add quite a bit to get the increasing gradients of colour I wanted (I was unable to track down the colouring gel mentioned in Raspberri Cupcakes post, and ended up using liquid natural pink food colouring). Pink was a special request from the birthday girl, but of course you could go with any colour you like (if I was making this for me, it would be purple). To decorate the cake I went with a white chocolate icing, decorated with edible red glitter and served the cake with raspberries.

What I was cooking this time last year: Salmon Pastries with Thyme Lemon Hollandaise Sauce

Vanilla Layer cake with White Chocolate Icing

* The cake recipe ingredients list is taken from a Women’s Weekly Recipe Card recipe.

Ingredients:

Cake

  • 250g softened butter
  • 2 teaspoons vanilla extract
  • 1 1/2 cups sugar
  • 4 eggs
  • 4 cups self-raising flour
  • Pinch of salt
  • 1 cup milk
  • food colouring

Icing

  • 400g white chocolate
  • 900mls cream
  • 100mls condensed milk

Method:

  • Turn the oven on to 180°C.
  • Beat the butter and vanilla together until pale and white.
  • Add the sugar to the butter and beat until light and creamy.

Buter and Sugar

  • Add the vanilla and salt and beat until combined.
  • Add the eggs, one at a time beating well after each addition.

Butter, sugar, eggs

  • Mix in a little of the sifted flour alternately with the milk, until everything is combined.
  • Divide the cake batter into 5 portions.

Cake Batter

  • Leave one portion uncoloured, then add food colouring to the remaining 4 portions so that you have increasing shades of colour across the portions.
  • Spread each portion out in its cake tin.

Layer cake

  • Cook each cake for approximately 15 minutes or until it springs back when touched in the center.
  • Allow your cakes to cool.
  • To make the icing, add the white chocolate, condensed milk and cream to a bowl.

White chocolate and cream

  • Suspend the bowl over a saucepan of hot water and gently heat until the chocolate is melted and everything is combined.
  • Cool the icing mixture in the fridge until firm.
  • Whip the icing to make it light and fluffy.
  • To assemble the cake, add one layer at a time to your serving plate, add a layer of icing in-between, then add the next layer of cake in decreasing colour gradients as you get to the top of the cake.

Layer cake build

  • Finish the cake by the top and edges with icing, and refrigerate until ready to serve.

Layer cake icing

  • Add any final decorations (I used edible red glitter) and birthday candles. Your cake is ready to serve. Enjoy.

Pink Layer Cake

What is your favourite colour? Has this post inspired any new ideas?

Leave a comment

Filed under Baking, Cake, Chocolate, Recipes, Sweet, Vegetarian

Chocolate jam

One of my favourite things in the world is chocolate cake. I also had an over-supply of jam recently, and decided to experiment by including jam in my chocolate cake.  I used blackberry jam, but you can of course use what ever jam you prefer. I started with a Nigella old-fashioned chocolate cake recipe, and replaced half the sugar with jam. I liked the result, but the jam in the cake mixture was still quite subtle, so, next time, I will replace all the sugar with jam (and do away with the need to add milk). The dollop of jam hiding inside is a nice surprise when you bite into the cupcakes.

Blackberry jam

For the icing I used dark chocolate, and to help it match the sweetness of the cake, I added condensed milk. Condensed milk in a tube is a wonderful thing, you can add a squeeze instead of vanilla and icing sugar when whipping up some chantilly cream.

What I was cooking this time last year: Fried Saganaki Cheese with Salsa

Chocolate blackberry cupcakes

* This recipe’s base ingredients were inspired by a Old-Fashioned Chocolate Cake recipe that appears in Nigella Lawson’s cookbook, Feast. I have modified and adapted Nigella’s recipe to come up with the below reincarnation.

Ingredients:

Makes 12 cupcakes.

Cupcakes

  • 200g self-raising flour
  • 100g sugar
  • 200g blackberry jam
  • 50g cocoa powder
  • 175g butter
  • 2 eggs
  • 1 vanilla bean or 1 teaspoon of vanilla extract
  • 150g sour cream or yoghurt
  • 50mls milk

Icing

  • 100mls cream
  • 200g dark chocolate
  • 50mls condensed milk

Method:

  • Heat oven to 180°C.
  • Add the butter, sugar and vanilla to your food processor bowl and mix until light and fluffy.

Butter, sugar, vanilla

  • Add the eggs, milk, sour cream and 100g of the jam and mix until thoroughly combined.

Butter, sugar, jam

  • Add the cocoa powder and flour and mix until thoroughly combined.

Cocoa powder mixture

  • Place cup cake cases into your baking tray.
  • Spoon mixture into the base of each cup cake case.
  • Add a spoon of jam on top of the cake mixture in each cup cake case.

Chocolate cake mix, jam

  • Top the jam with another spoon of cake mixture.
  • Bake the cupcakes for approximately 25 – 30 minutes, or until they spring back when lightly touched.
  • To make the icing, add the chocolate, cream and condensed milk to a large bowl.

Chocolate and cream

  • Suspend the bowl over a saucepan of hot water and gently heat until the chocolate is melted and everything is combined.
  • Cool the icing mixture in the fridge until firm.
  • Whip the icing to make it light and fluffy.

Chocolate icing

  • When the cupcakes are cooled, spread the tops with icing. Your cupcakes are ready to serve. Enjoy.

Chocolate cupcakes

How do you like to eat your jam? Has this post inspired any new ideas?

Leave a comment

Filed under Baking, Berries, Cake, Chocolate, Recipes, Sweet, Vegetarian

Anzac inspiration

Anzac day is recognised on the 25th of April in Australia and New Zealand. Anzac stands for Australian and New Zealand Army Corps, and marks one of the defining moments in the forming of Australia’s national identity. A recipe that is associated with this day of remembrance is the Anzac biscuit. Anzac biscuits are traditionally made from rolled oats, flour, desiccated coconut, sugar, butter, golden syrup and baking soda. It is claimed they gained popularity because the biscuits would last the time and distance it took for them to travel from kitchens in Australia and New Zealand to loved ones dispatched far from home.

I played with the traditional recipe and used condensed milk instead of sugar and golden syrup. If you want to stick to the traditional recipe, follow the details below but leave out the chocolate chips, and replace the condensed milk with 1 cup of sugar and 1 dessert spoon of golden syrup. Even though my recipe uses condensed milk the end result was not an overly sweet biscuit, the condensed milk having less sugar than the sugar and golden syrup that would have normally been used. I added chocolate chips, purely because I love chocolate chip biscuits. If you want chewy biscuits, leave the mixture in heaped spoonfuls on your baking tray. If you prefer a crispy biscuit, flatten out your spoonfuls of biscuit mixture.

Chocolate chip oat biscuits

Ingredients

  • 1 1/2 cups rolled oats
  • 1 cup plain flour
  • 1 cup desiccated coconut
  • 1 teaspoon baking soda
  • 1 egg
  • 100g butter
  • 1 x 395g tin condensed milk
  • 200g dark chocolate

Method

  • Preheat the oven to 180°C, grease 4 baking trays with a generous coating of butter or oil (or use non-stick baking trays).
  • Measure out the oats, flour, coconut and baking soda into a bowl.

Oats flour

  • Chop the dark chocolate into the size you would like your chocolate chips to be (chunky or finely chopped – it’s up to you) and add to the bowl.

Chopped chocolate

  • Add the butter to a saucepan and gently heat until just melted.
  • Add the melted butter, egg and condensed milk to the dry ingredients in the bowl.

Biscuit mixture

  • Stir to combine.
  • Place tablespoonfuls of your biscuit mixture onto your baking trays (I spaced 6 biscuits per tray).

Biscuit mixture on trays

  • Bake your biscuits in the oven for approximately 20 minutes, or until golden brown (you may need to do this in batches depending on how much room there is in your oven).
  • Remove cooked biscuits from the oven and allow to cool for 5 to 10 minutes on the baking trays. You can sample one or two biscuits now for quality control purposes.

Chocolate Chip Oat Biscuits

  • Transfer the biscuits to a wire rack and allow to totally cool. Your biscuits are ready to serve or store in an air-tight container. Enjoy.

What is your favourite biscuit? Has this post inspired any new ideas?

1 Comment

Filed under Baking, Biscuits, Chocolate, Oats, Recipes, Sweet, Vegetarian